Events component
Create an "Events" section to display upcoming events.
This guide demonstrates how to add an Events section to a page using the Events component. An "Events section" is a compilation of already created Event pages.
Note - This component only features published events and provides users with a URL to access the complete event information page. This means that you must have already published an Event page on your site to be able to access this feature.
Step by step
To add the Events component:
- On the page you are creating or editing, select the Component tab. Then, tap the Components drop-down.

- Choose Add Event.
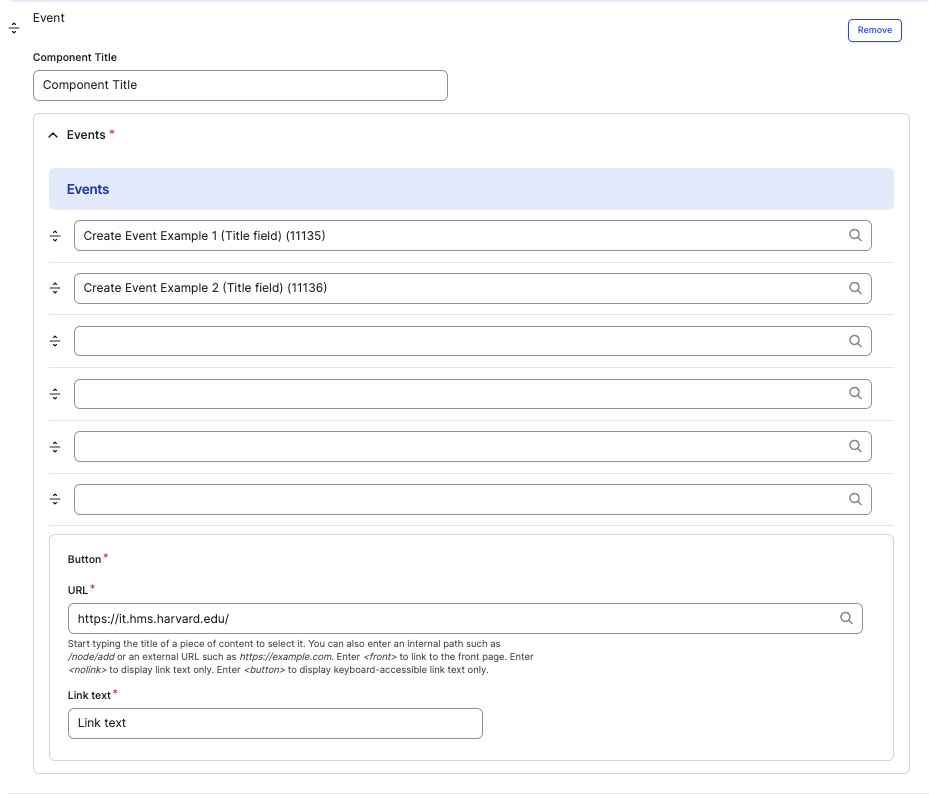
- The component will appear. Complete the following fields:
- Component Title - Enter a title for the section. This appears as a heading above the cards.
- Events - If the event has not been added to your site, create an event page first. If the event is published on your site, enter the title in the Search bar. Select the article from the drop-down. The title, date, and URL will be auto-loaded and no further action is needed.
- Button - The intention is to create a button to link to the main Event view on the website, but the button can say and link to whatever is desired.
- URL - Enter the URL of the page the user will be brought to.
- Link text - Enter a title that describes the link destination. For example, "IT Org Chart".
- Additional actions you can take include:
- To move or rearrange the order of items, drag and drop a section to the position you'd like using the drag handles, found to the left of the item.
- To remove a single resource, tap the three dots within the item section, then select Remove.
- To delete the entire component, tap Remove. Then, tap Confirm removal.
- Select Save. If you are ready to publish your page, ensure the Published toggle is enabled (green in color).
Example
Front-end
Component Title
Dec
30
Create Event Example 1 (Title field)
Friday, December 30, 2033
All Day
This is an example of the "Body" field.
Back-end