Webform component
Embed an existing webform on your site.
This guide demonstrates how to add the Webform component to embed an already existing webform, such as a newsletter sign-up, to your site.
Note - This component requires a webform. To create a webform, contact warp-web-help@hms.harvard.edu for assistance.
Step by step
To add the Webform component:
- On the page you are creating or editing, select the Component tab. Then, tap the Components drop-down.

- Choose Add Webform.
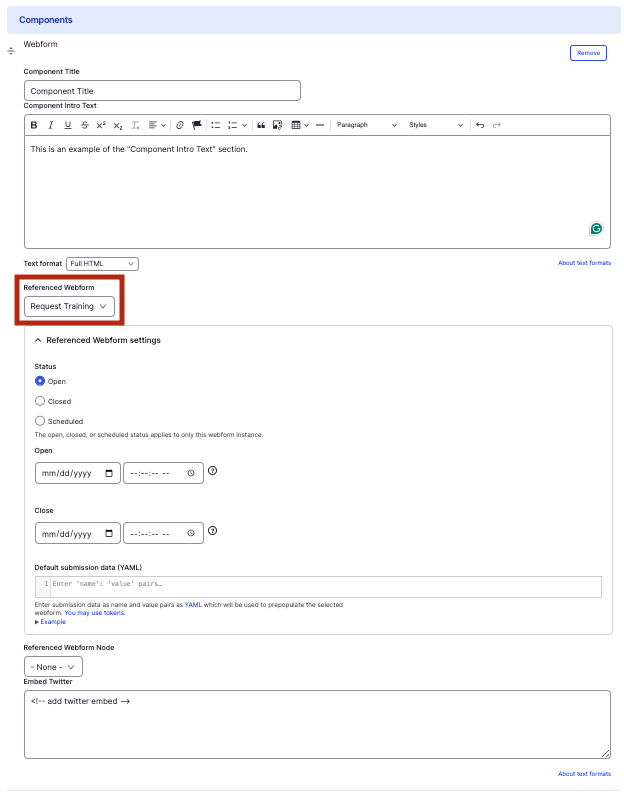
- The component will appear. Complete the following fields:
- Component Title - Enter a title for the section. This appears as a heading above the cards.
- Component Intro Text - Enter a short description of the section.
- Referenced Webform - Select an existing Webform to embed. If you have not already created a webform, contact Michael Garofalo at warp-web-help@hms.harvard.edu for assistance.
- Referenced Webform settings - Ignore this section as the settings are pre-configured through the webform itself.
- Referenced Webform settings - Ignore this section as the settings are pre-configured through the webform itself.
- To delete the entire component, tap Remove. Then, tap Confirm removal.
- Select Save. If you are ready to publish your page, ensure the Published toggle is enabled (green in color).
Example
Front-end
Request Training (Component Title)
This is an example of the "Component Intro Text" section. The form displayed below is a pre-made Webform to "Request Training".
Back-end